Poco-Cocoa

Things & Stuff

  • Angry pasta

    I usually avoid making spicy meals, primarily because my taste buds are wimpy. However, in my recent attempt to expand my food horizons, I decided to try out a few spicy dishes. What’s funny is that Justin didn’t think this dish was spicy at all, though my tongue was burning. I blame it on my super-taste buds. I tend to taste things that others don’t. Examples:

    • “I think the vanilla that I used in this cookie was bad.”
    • “Whoa! They used almond extract in this.”
    • “Ew. I think a bit of olive got in my dish.”
    • “The flour I used for this bread was definitely too old.”
    • “Wow, that fresh garlic is spicy.”

    When you have super-taste buds, you also tend to have super-smelling abilities:

    • “I think there’s a bad potato in the kitchen.” (There was.)
    • “Whoa! When you opened that bottom cabinet, it smelled like rotting fruit.” (After which my coworker found rotting apples in the corner of the cabinet.)
    • “Oooooh, somebody’s growing basil.” (They were.)
    • “I smell chocolate!” (I’m very adept at finding this smell.)

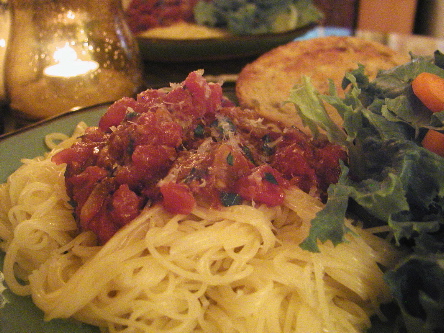
    Anyway, the dish was good, a little spicy, and a little sweet. I think next time I’ll use crushed tomatoes instead of diced, just because I prefer a sauce to chunky bits of tomato on my pasta. I also used the balsamic vinegar instead of red wine, because I love, love, love balsamic vinegar. And finally, I used dried oregano instead of Italian seasoning.

    And in case you were wondering, the name of this dish comes from the Italian word arrabbiare, which means “to get angry.”

    Arrabbiata Sauce

    • 1 teaspoon olive oil
    • 1 cup chopped onion
    • 4 garlic cloves, minced
    • 1/2 cup dry red wine or 2 tablespoons balsamic vinegar
    • 1 tablespoon sugar
    • 1 tablespoon chopped fresh or 1 teaspoon dried basil
    • 1 teaspoon dried crushed red pepper
    • 2 tablespoons tomato paste
    • 1 tablespoon lemon juice
    • 1/2 teaspoon dried Italian seasoning
    • 1/4 teaspoon black pepper
    • 2 (14.5-ounce) cans diced tomatoes, undrained
    • 2 tablespoons chopped fresh parsley

    Heat oil in a saucepan or large skillet over medium-high heat. Add onion and garlic; saute 5 minutes. Stir in wine and next 8 ingredients; bring to a boil. Reduce heat to medium, and cook, uncovered, about 15 minutes. Stir in parsley.

    Makes 3 cups.

    Source: Cooking Light magazine.

    April 28, 2005
    Recipes
  • Food Find: Blue Bell Dos Amigos Ice Cream

    I found this ice cream at our local Fresh Plus grocery store on one of my “Oh my gosh I need some chocolate right now” days. I just have to say that it’s delicious alongside my friend Lindsay’s brownies (which I will hopefully be making and posting about soon, because man, they’re good). The ice cream is a swirl of Mexican vanilla, creamy and smooth, with Mexican chocolate, a bit spicy with a hint of canela (cinnamon). I’m guessing it’s available in larger containers, but since we’re not big ice cream eaters, we bought it pint-sized.

    Just another temptation for you when you’re out grocery shopping…

    April 27, 2005
    Edibles
  • Mexican meets Italian

    Last night, Lindsay, Chad, and Andy came over for dinner and a movie. For dinner, I made Taco Pizza…my own creation that brings together my love for pizza with my Mexican roots. Or…Mexican-American roots. Okay, New Mexican roots. I served it with salad and steamed broccoli, plus hibiscus tea and Justin’s Southern sweet tea. (Which is just regular tea with tons of sugar in it.)

    I think the thing that makes this pizza spectacular is the crust. I have stuck with this crust for a long time now, because it is so easy, and so good! (Any of you Homestar Runner fans? So Good!) You can top it with anything, including taco fixings. It’s also great with oven-roasted shiitake mushrooms and garlic, or tomatoes and fresh mozzarella, or marinara sauce and shredded cheese. I think pizza crust is a great place to start in making your own yeast breads. It only has to rise once, and has a fairly simple ingredient base. But if pizza crust seems daunting, just use a ready-made crust and the taco toppings–whatever floats your boat.

    As for the movie, we walked over to our friend Jeremy’s place to watch Henry Fool on his HUGE…wall. He just bought a projector, and let me tell you, it rocks. The movie was thought-provoking and a little nuts, with one of those endings that makes you say, “Grrr…” At any rate, it was fun.

    Taco Pizza

    Crust

    • 7 ounces warm water
    • 1 teaspoon sugar or honey
    • 2 teaspoons (1 packet) active dry yeast
    • 1 1/2 teaspoons olive oil
    • 1/2 teaspoon salt
    • 1 1/4 cups all-purpose flour, plus a bit
    • 1 cup whole wheat flour
    • Cooking spray

    Toppings

    • 1 can vegetarian refried beans, heated in the microwave until spreadable
    • 1 1/2 cups shredded Colby-jack cheese
    • 2 cups chopped lettuce
    • 2 tomatoes, diced
    • 1 avocado, diced
    • Salsa (we like Leal’s, which we’ve only been able to find at Central Market)

    For the crust: Place water and sugar or honey in a large bowl and sprinkle the yeast on top. When the liquid foams (after a few minutes), add the oil and salt. Stir in the flours, kneading the last in as the dough gets too stiff to stir. Turn dough out onto a flour-dusted surface and knead until smooth and elastic, about 6 to 8 minutes. Place in a bowl coated with cooking spray, spray the top of the dough, cover with plastic wrap or a towel, and let rise in a warm place until doubled in bulk, about 50 to 65 minutes.

    For the pizza: Preheat oven to 425 degrees.

    Punch down the dough and let it rest for 3 to 5 minutes. Roll out into a 12-inch circle and place on a pizza pan. Spread heated beans over the top of the dough, and sprinkle with cheese. Bake for 15 to 18 minutes until crust is lightly browned and cheese is melted.

    Top with lettuce, tomato, and avocado, and slice into 10 pieces. Serve with salsa.

    Makes 10 slices.

    Source: Crust recipe from Passionate Vegetarian by Crescent Dragonwagon, pizza recipe by Crystal

    April 27, 2005
    Recipes
  • There’s a fish in my house!

    Folks, you are looking at the first animal-flesh dish I have made in my house for about two and a half years. I have been eating bits and pieces of meat here and there when we go out, but had yet to cook any at home . I also cook bacon every day at the bed and breakfast, but haven’t eaten any, since I’m really not a bacon fan. I’m starting slow, with something already cooked, packaged, and processed: tuna.

    This used to be one of our favorite dishes in our pre-veg days. It’s really easy and quick to prepare, and so tasty. It’s like a kicked-up tuna salad, with Mediterranean flavors and artichoke hearts. I changed the recipe somewhat; the original called for the tuna mixture to be spooned on top of two split and toasted English muffins and topped with provolone cheese. We prefer pitas and our favorite cheese, Colby-jack.

    Tuna Melts

    • 1/2 cup drained canned artichoke hearts, finely chopped (I use one 7-ounce can)
    • 1/4 cup sliced green onions
    • 1 tablespoon fresh lemon juice
    • 1 teaspoon olive oil
    • 1/2 teaspoon dried oregano
    • 1/8 teaspoon black pepper
    • 1/8 teaspoon ground red pepper
    • 1 (6-ounce) can or pouch albacore tuna in water, lightly drained and flaked
    • 3 pitas, warmed or toasted in the oven
    • 6 tablespoons (1 1/2 ounces) grated Colby-jack cheese

    Preheat oven to 400 degrees.

    Combine first 8 ingredients in a medium bowl. Divide evenly among pitas; sprinkle with cheese. Place on a baking sheet; bake 5 minutes or until cheese is melted.

    Makes 3 servings.

    Adapted from Cooking Light magazine.

    April 25, 2005
    Recipes
  • I was crafty!

    Check it out…my first curtains! I bought the fabric (I wish you could see the detail…it’s so pretty) a long time ago to replace the old “smoker’s white” curtains that hung in our bathroom. I kept putting off sewing them, because I’m a bit of a perfectionist, and was afraid to screw it up. But this weekend, I put my nose to the sewing machine and whipped these out in an hour or two.

    I actually started with the curtain shown below, which covers up our bathroom shelves nicely. I’m glad I did that one first, because I learned from my mistakes and was able to have prettier, more professional-looking hems on the window curtains. Basically, you can’t skip the step of pressing the seams flat.

    photo by crystal

    So now our bathroom is almost completely decorated…we still have one wall that needs a little something on it, but I’m sure Justin can take care of that with his art skills.

    April 25, 2005
    Crafty
←Previous Page
1 … 259 260 261 262 263 … 270
Next Page→

© poco-coca